
Part II · Chapter 08
The Optics Catalog In Depth
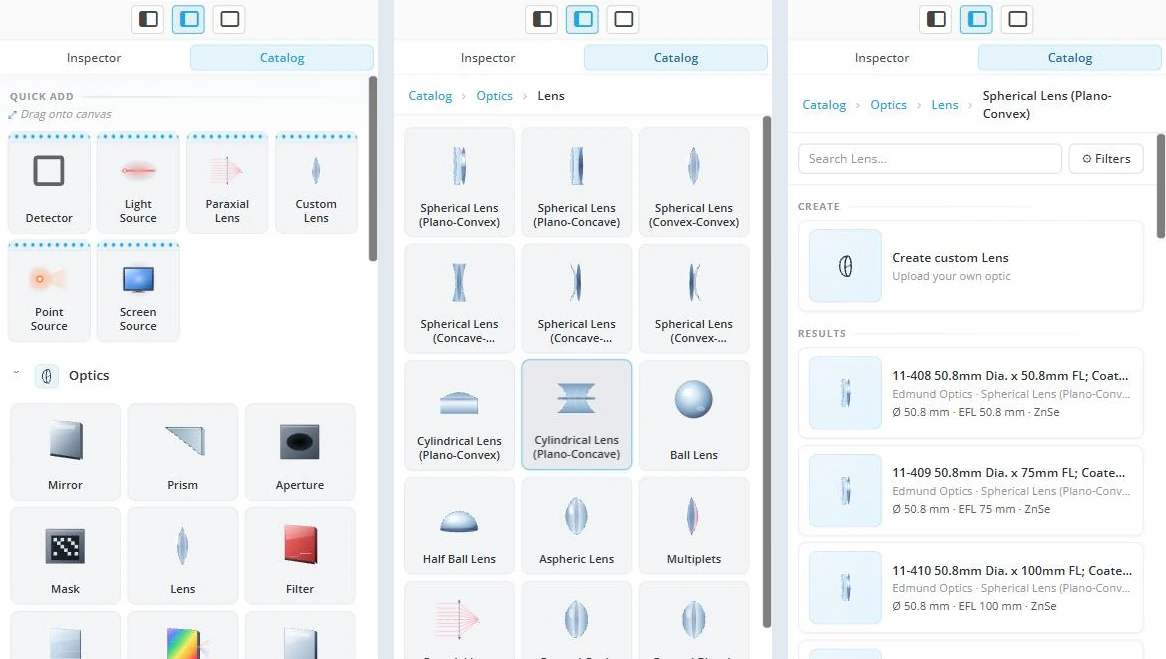
The five categories
The Catalog tab has five categories: Optics, Optomechanics, Light Sources, Detector and Paraxial.
Detector and Paraxial place a default part at once. The other three open a grid of types (Mirror, Lens, Prism, Filter and so on for Optics; vendors and series for Light Sources), then a list of results for the type you choose.
The Optics types also include Polarizing Element, Ideal Microscope Objective and Ideal Beam Expander.
Quick Add
The Quick Add row above the categories is a fixed set of shortcuts: Detector, Light Source, Paraxial Lens, Custom Lens, Point Source and Screen Source. Each places a default part or opens its creation form.
The Quick Add Light Source has no LED type. For an LED, use Add user-defined light source from the right-click canvas menu.
Searching and filtering
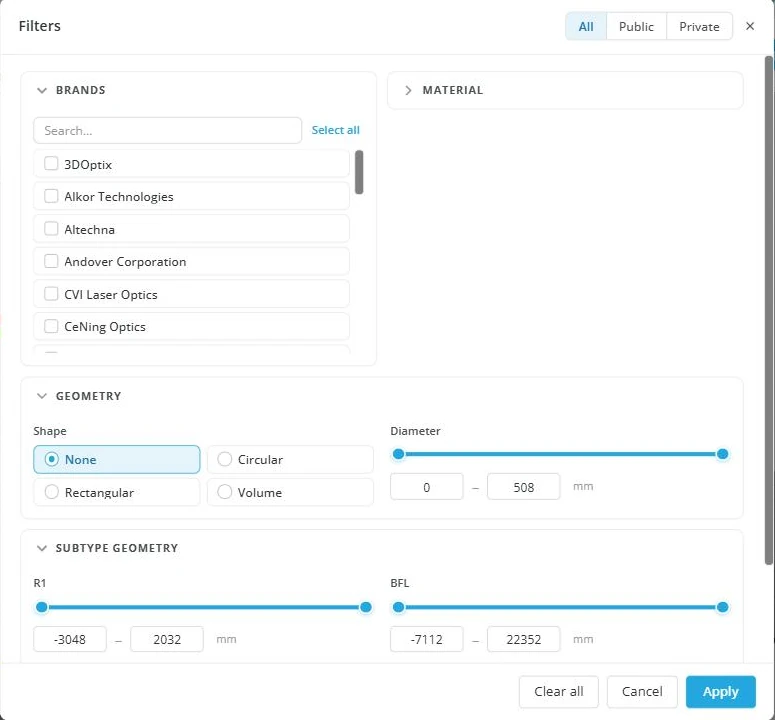
The results page of a type has a search box and a Filters button. The filters for optics are:
- Brands: pick one or more; the list is searchable.
- Material: pick one or more.
- Subtypes: pick one or more.
- Geometry: a shape (None, Circular, Rectangular or Volume) and a diameter range.
- Subtype ranges, shown once a subtype is chosen: focal length and radius for lenses, cut-off, center wavelength and bandwidth for filters, grooves per mm for gratings.
- Permission: All, Public or Private, by who owns the catalog entry.
Ranges are shown in your setup's units, mm or inches.
Creating a custom part
Each type's results page has a Create custom entry, for example Create custom Lens. Drag it onto the canvas to open the custom optics form with that type already chosen. The form is described in Creating Custom & Uploaded Components.
Dragging a part onto the canvas
Press on a catalog item or Quick Add chip and drag it into the viewport. A marker on the grid shows where the part will land. Release to place it; for parts with parameters, the creation form opens first. Release outside the canvas, or press Escape, to cancel.
Editing a placed catalog part
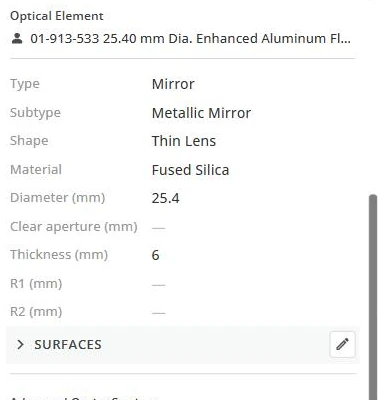
Select an optic and open Optics Settings in the Inspector. It shows a 3D preview, a link to the vendor's product page and three groups of properties:
- Geometry: diameter, thickness and the radii of curvature. For a lens, the effective, back and front focal lengths (EFL, BFL, FFL) are shown as well.
- Material: the glass and its dispersion data. Changing the material is Professional-tier.
- Surfaces: the element's faces. Select a face to see its coating data and to set its reflection behavior (non-reflecting by default, or up to 50 bounces) and its scattering model.
You can edit the diameter, thickness, radii and material. The catalog entry stays unchanged; the edited part is saved as a copy with a (customized) prefix in the Parts tree, and you can rename it. When you change a value, EFL, BFL and FFL update at once, so you can tune a lens to a target focal length in place.


